
As soon as I discovered Pinterest I was hooked.
But nothing in the "Pinterverse" -- as Doug calls it -- was more enticing than the adorable homemade play kitchens I found there. I decided that Mackenzie just HAD. TO. HAVE. ONE.
I realize that I'm a little behind on this craze, but to be honest I never really paid much attention to these things before having a toddler.
Like many moms who have ventured into play kitchen construction I found a ton of inspiration on Ohdeedoh, including this great tutorial. But since I'm not one of those natural DIY people I quickly realized that I had my work cut out for me. If I had chosen to follow in the footsteps of the highly ambitious and enviably crafty mothers who rescue old nightstands from Goodwill or salvage leftover wood from Lowes and make chicken soup out of -- well, you know -- I would have had the thing transformed and ready for Mackenzie by the time she went off to college.
So I searched and searched for different ideas and finally decided to use this insanely cute kitchen as my muse. Total genius... base parts purchased at Target (or Target and Dirt Cheap, in Alisha's case... wish we had one of those around here!). The three pieces are all actually bathroom furniture: a floor cabinet serves as the fridge ($30), a two-cubby storage cube acts as the sink ($20), and a wall cabinet serves as the oven and stove ($30). I could have kicked myself for not thinking of Target in the first place. It's one of my favorite places to shop and I'm there twice a week on average.
But I digress...
On to the details!

I knew my biggest obstacle was going to be the sink, mostly due to the fact that I don't own a jig saw. Initially I thought Home Depot would be able to help, but they only do straight cuts. Luckily our neighborhood handyman was able to do it while he was at our house working on another project. In an effort to save some money I originally planned to use an 8" baking dish for the sink. It's been sitting in a cabinet above my oven for the last four years completely untouched. But I ended up springing for a stainless steel dog bowl from Target ($6) so that the sink matched the faucet. Which brings us to... The faucet.
 As it turns out, the sink was relatively easy compared to the faucet situation. I had seen several different options when doing my "research" for this project: wooden letter J pieces flipped upside down, authentic bathroom or kitchen faucets ($$$), and J or P-trap piping. I liked the piping idea best, but didn't want to use PVC if I could use chrome or stainless steel instead (again, I liked the idea of everything matching!) If the chrome pipe didn't work I was going to use PVC as backup and spray paint it silver.


Like many others out there, I chose to use Ikea Panna coasters for the stove top burners ($1.99 for a pack of 6). These are cheap and look pretty authentic. Plus they're rubber and easily adhered to my "stove top". The stove top knobs are from Home Depot, just like the rest of the hardware I bought. I definitely could've kept the cost of things down a bit had I not splurged on hardware, but oh well. I think the brushed nickel looks super cool with the white cabinetry. Cheaper options include buying wood knobs from the hardware store and spray painting them. I had initially thought about using actual stove dials but they looked really bulky on such a cute little play kitchen (So I ended up returning the package to Home Depot, along with a host of other things!) The total cost for hardware was about $23: two knobs for the faucet, three knobs for the stove dials, an oven handle, cabinet handle, and fridge handle.
DRILL, BABY, DRILL

I knew from the start that anything involving power tools was going to have to be covered by Doug. I only fantasized about him wearing a tool belt a couple of times (I kid, of course. This is a project for our children... GEESH!)
In all seriousness, I couldn't have completed this project without him. Since I was splurging on hardware instead of using the white knobs that came with the Target furniture, I needed new holes drilled for each piece. Although some people out there opt to have the oven door open sideways (for safety reasons!) we decided that in order for things to look really authentic our oven would need to open from top to bottom. So far Mackenzie hasn't tried to step on it (fingers crossed!)
Doug moved the hinges for the side cabinet so that the oven opened properly. It took some adjusting but in the end it worked out perfectly!

He also drilled on either side of the sink so that we could screw a dowel in to hang the curtain. Some people use a tension rod but I couldn't find anything small enough and Home Depot ended up giving me the custom-cut dowel for free.

Holes were drilled for all the knobs (stove top and faucet) and the screws aren't tightened all the way so that Mackenzie can actually turn them. She hasn't quite figured that out yet, but I think it's pretty neat!
WE'LL GET TO IT OVENTUALLY
At some point we may add a divider for the oven and the adjacent cabinet, since the Target piece doesn't have one. But everything is so small that it would take a whole lot more drilling and planning in order to get the perfect fit. Besides, we're really happy with how things turned out. We even opted against painting anything since it matches our home kitchen. As the saying goes, if it ain't broke, don't fix it. So we may or may not separate the two sides eventually. Also a possibility: Get some sort of chain to attach to the oven door to keep it from opening all the way (right now it just about touches the floor when fully opened, though that hasn't seemed to be an issue yet).
FUN ACCESSORIES!
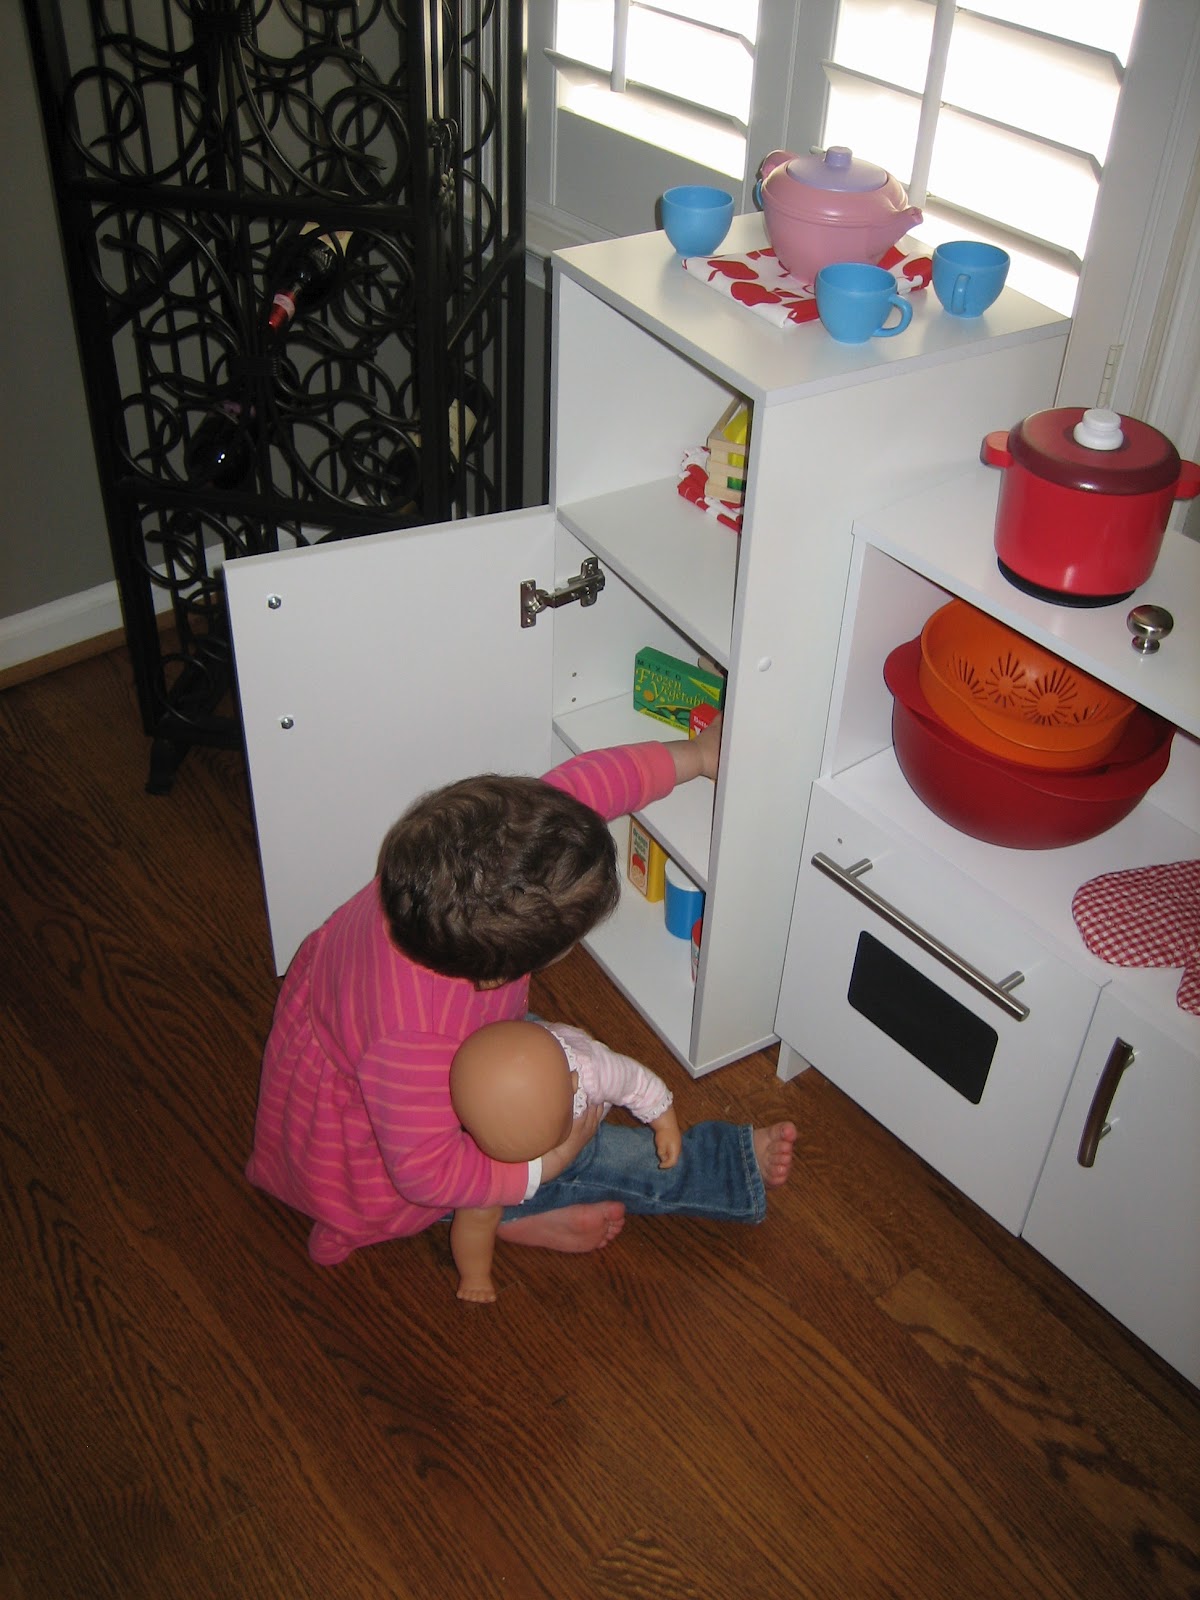
The kitchen accessories and play food are Melissa & Doug (LOVE THEIR STUFF!) and Green Toys. All the red and orange colanders are from Target. The utensil cup for wood spoons (Melissa & Doug) and the mini spatula (purchased at Home Goods) is a toothbrush holder/bathroom tumbler I had lying around the house. The red basket at the bottom of the sink is from Target and fits perfectly in the cubby. The oven "window" is actually a decal purchased from Chris Reth Designs off Etsy. It was Doug's idea to use a sticker rather than paint. It looks super cool up close and it's chalkboard vinyl, so Mackenzie can draw on it if she wants.
 And one of my favorite parts of the kitchen... The curtain! I searched high and low on Etsy -- among other places -- for the perfect fabric to hide the base of the sink. In the end I found these great apple print dish towels on clearance at -- you guessed it -- Target!
Lessons Learned:
* Gorilla Glue is not as strong as some would make it out to be. We preferred Elmer's Stix All Gel. Worked like a charm and help up to Mackenzie's super-human toddler strength.
* Home Depot will let you return just about anything.
* Most people are willing to help. You just have to be willing to ask.
 * The thrill of watching your child enjoy something you put together especially for them is just priceless!
FUN ACCESSORIES!
The kitchen accessories and play food are Melissa & Doug (LOVE THEIR STUFF!) and Green Toys. All the red and orange colanders are from Target. The utensil cup for wood spoons (Melissa & Doug) and the mini spatula (purchased at Home Goods) is a toothbrush holder/bathroom tumbler I had lying around the house. The red basket at the bottom of the sink is from Target and fits perfectly in the cubby. The oven "window" is actually a decal purchased from Chris Reth Designs off Etsy. It was Doug's idea to use a sticker rather than paint. It looks super cool up close and it's chalkboard vinyl, so Mackenzie can draw on it if she wants.
Lessons Learned:
* Gorilla Glue is not as strong as some would make it out to be. We preferred Elmer's Stix All Gel. Worked like a charm and help up to Mackenzie's super-human toddler strength.
* Home Depot will let you return just about anything.
* Most people are willing to help. You just have to be willing to ask.

Wow!! Nicely done. Love the photos with Mackenzie enjoying her play kitchen. Great step by step directions for anyone wanting use the idea.
ReplyDelete- Teri Williamson -
Beautiful job! You're very talented, Dominique!
ReplyDeleteOmg, this looks amazing. When are you coming over to make Izzy's?
ReplyDeletehttps://saglamproxy.com
ReplyDeletemetin2 proxy
proxy satın al
knight online proxy
mobil proxy satın al
3X7
https://saglamproxy.com
ReplyDeletemetin2 proxy
proxy satın al
knight online proxy
mobil proxy satın al
H0S5